
这将是我们这个模块的最后一节,主题是 Nuxt 项目工程化。
实际上 Nuxt 已经帮我们完成了大部分任务,例如:项目创建、自动导入、路由生成、ts支持、服务端整合/渲染、打包等等。 美中不足的是,Nuxi 目前还比较弱,没有 create-vue 那样丰富个性化的配置,例如代码规范和测试支持。另外,项目开发时也需要一些额外的三方库、工具函数等,例如 HTTP 请求封装、图标库使用等等。
因此,我们本节计划完成如下任务:
- 代码规范;
- 代码测试;
- 整合 unocss;
- 使用图标;
- 使用模版项目。
最终,我们会得到一个不错的 starter 项目,作为起始,便于后续项目开发。如果你不关心该项目的搭建过程,可以直接跳到最后一步,学习如何以该项目为模版创建新项目即可。
# 代码规范
通常代码规范这块的配置是非常繁琐的,例如我们通常需要结合 ESLint + Prettier,这需要两个配置,还要有额外插件的安装。这里我给大家推荐的方案是 @antfu/eslint-config (opens new window),优点是配置非常简单,支持 ts,单独使用不依赖 Prettier。
# 安装
需要安装依赖:
sql
复制代码yarn add -D eslint @antfu/eslint-config typescript
# 配置 .eslintrc
创建 .eslintrc:
perl
复制代码{
  "extends": "@antfu"
}
# 添加脚本 package.json
添加lint和lint:fix两个命令脚本:
json
复制代码{
  "scripts": {
    "lint": "eslint .",
    "lint:fix": "eslint . --fix"
  }
}
# 自动格式化
配置 VS Code 可以实现自动格式化代码:
创建配置文件:
.vscode/settings.jsonjson 复制代码{ "prettier.enable": false, "editor.formatOnSave": false, "editor.codeActionsOnSave": { "source.fixAll.eslint": true } }
# 代码测试
在 Nuxt3 中,可以使用官方提供的@nuxt/test-utils编写单测。
# 安装
css
复制代码yarn add --dev @nuxt/test-utils vitest
# 编写测试
创建 test/index.spec.ts:
javascript
复制代码import { describe, expect, test } from 'vitest'
import { $fetch, setup } from '@nuxt/test-utils'

describe('My test', async () => {
  await setup({
    // test context options
  })

  test('index page should be work', async () => {
    const html = await $fetch('/')
    expect(html).toMatch('<h1>Index Page</h1>')
  })
})
如何使用 vitest 编写单测:vitest.dev/guide/ (opens new window)
# 添加脚本 package.json
添加一个 test:unit 命令执行测试:
json
复制代码{
  "scripts": {
    "test:unit": "vitest"
  }
}
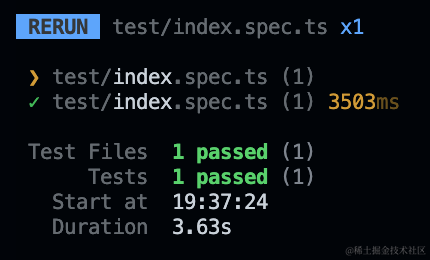
执行测试,效果如下:
# 整合 UnoCSS
下面整合 UnoCSS,这是一个按需原子化 CSS 引擎,比起直接使用 TailwindCSS 更轻更快!
# 安装
安装模块 @unocss/nuxt:
sql
复制代码yarn add @unocss/nuxt -D
# 配置
配置模块,nuxt.config.ts:
ruby
复制代码export default {
  modules: [
    '@unocss/nuxt',
  ],
  unocss: {
    uno: true, // enabled `@unocss/preset-uno`
    icons: true, // enabled `@unocss/preset-icons`
    attributify: true, // enabled `@unocss/preset-attributify`,
    // core options
    shortcuts: [],
    rules: [],
    safelist: [],
  },
}
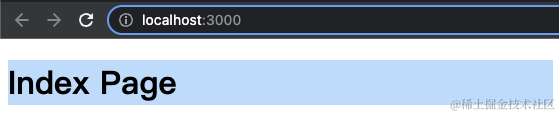
测试效果,index.vue
ini
复制代码<h1 class="bg-blue-200">
  Index Page
</h1>
效果如下:
# 使用图标
由于前面引入了 UnoCSS,因此图标的使用遵循它的规则即可:
- 在 Icônes (opens new window) 或者 Iconify (opens new window) 搜索图标;
- 安装所属图标集;
- 按照
<prefix><collection>-<icon>规则使用图标。
# 搜索图标
可以在 Icônes (opens new window) 或者 Iconify (opens new window) 搜索图标,例如我们想要找一个 nuxt 图标,在下面地址搜索该关键字:icones.js.org/collection/… (opens new window)

# 安装图标集
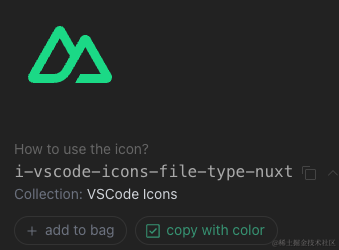
我们选择 vscode-icons 图标集:
安装该依赖:
sql
复制代码yarn add @iconify-json/vscode-icons -D
# 使用图标
按照<prefix><collection>-<icon>规则使用图标。
例如上面的 nuxt 图标规则为:i-vscode-icons-file-type-nuxt,就可以像下面这样使用:
ini
复制代码<div class="i-vscode-icons-file-type-nuxt" />
# 使用模版项目
到目前为止,我们的模版已经基本做好了,大家可以将项目推送到 github 以备后续使用,使用方法如下:
bash
复制代码npx nuxi init -t gh:org/name
上面的 gh 是 github 缩写,org 为组织名或者用户名,name 为项目名,比如我的 github 用户名为 57code,项目名称为 nuxt3-starter,则初始化项目可以使用下面命令:
bash
复制代码npx nuxi init -t gh:57code/nuxt3-starter
# 总结
工程化相关的内容就跟大家先说到这里了,工程化总体上是从项目创建 -> 开发 -> 测试 -> 部署 -> 维护的一系列任务。这里面有一些任务还未涉及,但是主要的任务都给大家介绍到了,一些特殊的需求也欢迎大家一起来总结分享经验


